
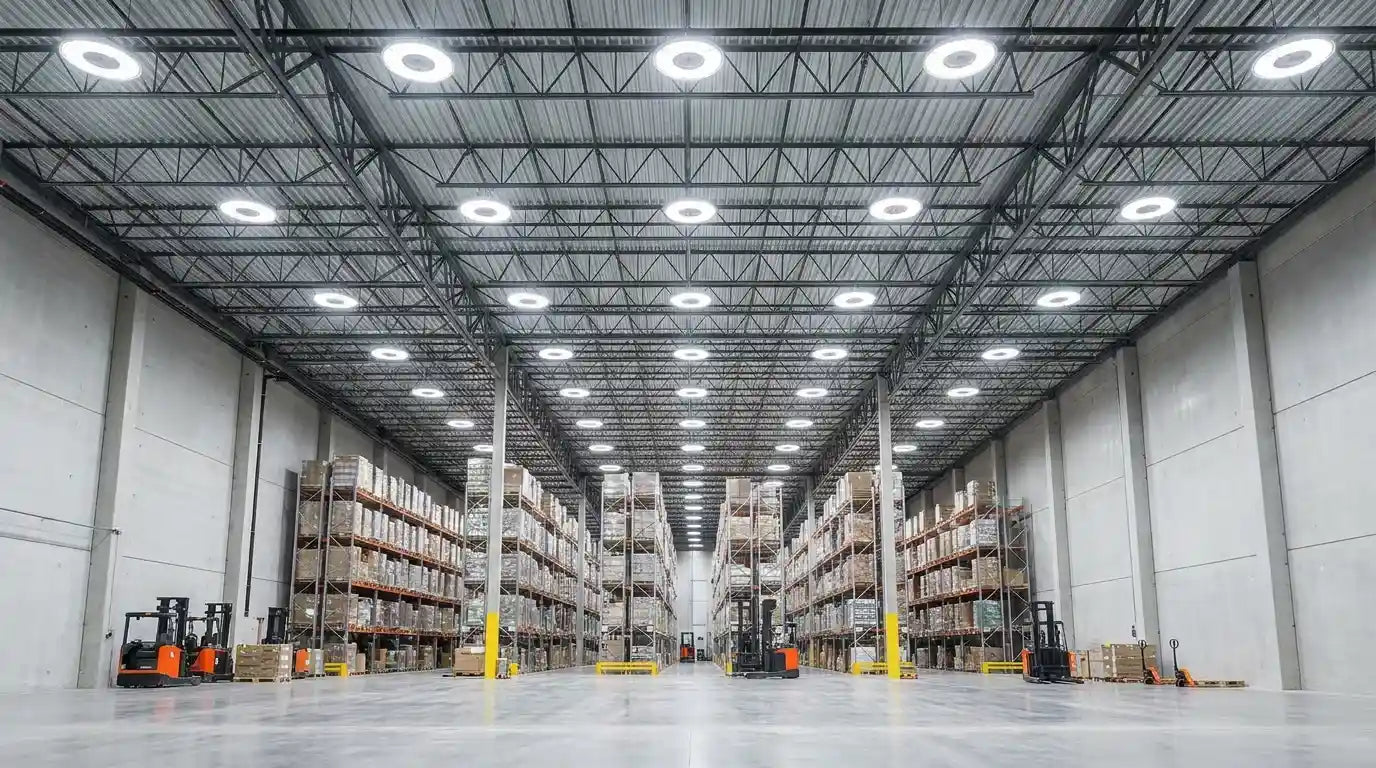
Walking into a warehouse or gymnasium and immediately feeling like you are in a dark cave is a terrible experience. Poorly spaced high bay lights lead to dark spots, severe eye strain, and completely wasted energy. When you are designing an industrial space, getting the layout right is just as important as buying the right fixtures.
High bay lighting is specifically designed for large commercial and industrial areas with high ceilings. These spaces include manufacturing plants, distribution centers, large retail stores, and recreational facilities. Because the ceilings are so high, the light has to travel a long distance to reach the floor. If you place the fixtures too close together, you waste electricity and create blinding glare. If you place them too far apart, you get a polka dot effect with bright pools of light and dark, dangerous aisles in between.
This detailed, high-bay light spacing guide is full of the right formulas, useful lights spacing charts and rules of thumb. We will explain the right way to space fixtures to match any type of ceiling height to light your facility for any task.

Why Proper High Bay Spacing Matters
It's important to consider the reasons before jumping into the numbers. Correct spacing isn't merely to make the room good looks. It affects your profits, on-site safety, and facility productivity. First of all, good spacing provides light uniformity. Uniformity is the even distribution of the light throughout the entire floor. Do not want to have polka dot effect meaning the directly below space is too bright, and the space between fixtures isn't. Balanced lighting is on the whole better for workers' eyesight as well as helping to ensure safe manoeuvrability of forklift trucks. It also helps to increase employee engagement and the likelihood of a successful pick rate in a distribution centre. Secondly, well-spaced planting optimises energy efficiency. If you need to use more lights that you think there will be dark spots, you're actually wasting the money. Excessive lighting in the area wastes extra power and expenses. You will get the right configuration with exact calculation of the number of fixtures required, achieving balance of brightness and energy saving.
Third, accurate spacing ensures safety and regulatory compliance. Different work environments require specific light levels, measured in foot candles or lux. OSHA and other safety organizations have strict regulations for industrial lighting. Determining the right spacing will help you reach the required levels which will minimize accidents at work and comply with the laws in your state.

The Golden Rule: Spacing to Mounting Height Ratio
The golden rule: the spacing to mounting height ratio Lighting specialists have a specific baseline formula that guides them as to how far apart the fittings should be.
The general rule of thumb for most standard high bay fixtures is that the spacing between lights should be equal to half of the mounting height. For example, if your mounting height is twenty feet, your lights should be spaced ten feet apart.
Nonetheless, it is important to understand the distinction between mounting height as well as ceiling height. Mounting height describes the space between the floor and the light fixture itself. If your ceiling is thirty feet high but you hang the lights on pendants at twenty feet, your mounting height is twenty feet.
In addition, designers will use the working plane height for any calculations they need to make. The working plane here means the height at which the work actually takes place. For a warehouse, this is typically the same level as the floor. For an office room or an assembly area, it is usually in the range of three or four feet from the floor. You determine the mounting height effectiveness by subtracting the working plane height from the physical mounting height.
High Bay Lighting Spacing Guide by Ceiling Height
We will now specify the optimal spacing based on the real height of your ceiling. It is important to note that the above-mentioned instructions are general. In fact, the requirements for the spacing may change depending on the chosen lighting installation.
Ten to Fifteen Foot Ceilings Spaces with ceilings in this range are often considered low bay or transition areas. For these heights, you do not need massive, high output fixtures. Linear high bays or lower wattage round fixtures work best. The ideal spacing for these ceilings is usually eight to twelve feet apart. This closer spacing ensures the light spreads evenly without creating harsh shadows.
Fifteen to Twenty Foot Ceilings This is the most common height for standard warehouses and gymnasiums. Standard round high bay fixtures are perfect here. You will want to aim for a spacing distance of ten to fifteen feet between each fixture. This range provides excellent coverage and ensures that forklift drivers and floor workers have plenty of visibility.
Twenty to Thirty Foot Ceilings As the ceiling gets higher, the light has to work much harder to reach the ground. For this height, you need high output fixtures. It is also highly recommended to use fixtures with a slightly narrower beam angle to push the light further down. The ideal spacing distance expands to fifteen to twenty feet apart. Placing them closer than fifteen feet at this height will result in excessive overlap and wasted energy.
Thirty to Forty Plus Foot Ceilings Very high ceilings require specialized, very high output fixtures. You must use fixtures with narrow beam angles, typically sixty degrees or less, to concentrate the light into a tight beam that can reach the floor. For these massive spaces, the ideal spacing distance is twenty to thirty feet or more apart. Proper LED high bay placement in these extreme heights is critical to avoid creating a cavernous, dark environment.

Key Factors That Affect High Bay Spacing
Even though ceiling height is going to be the major factor determining your plan, there are still a few other variables that you need to consider. Overlooking them might result in an inefficient lighting system.
Beam Angle The beam angle determines the width of the light distribution. For example, a beam angle equal to one hundred and twenty degrees causes light to disperse very quickly. Such angles are good when working with low ceilings; however, they are bad for high bay fixtures since the light disperses in the air too fast. A narrow beam angle, on the other hand, will keep the light directed to the same point, allowing it to go farther. This happens because of the inverse square law of light.
Fixture Type The physical shape of the fixture changes how you layout the room. Round fixtures, commonly called UFO high bays, emit light in a circular pattern. They are typically laid out in a square or staggered grid. They also feature excellent thermal management due to their compact, heat sink heavy design. Linear high bays emit light in a rectangular pattern. They are best suited for aisles and are laid out in straight rows. Choosing the right shape for your specific room layout is essential for even coverage.
Knowing the terms ’lumen output’ and ’wattage’ Lumen is the measurement of the total visible light released by the source. A higher lumen output means more distance between the fixture, because one light covers a wider area. If you choose lower lumen fixtures, you will need to pack them closer together to achieve the same overall brightness on the floor. Always look at the lumens per watt ratio to ensure you are getting the most efficient fixture for your budget.
Environment and Reflectance The physical environment of your building plays a huge role in how light behaves. Light colored floors, walls, and ceilings reflect light back into the room. This bounced light fills in the dark spots between fixtures. If your facility has dark concrete floors and dark walls, the light is absorbed, and you will need to space your fixtures closer together to compensate for the lost reflectance.
How to Calculate High Bay Spacing Step by Step
If you want to do the math yourself instead of guessing, follow this simple process. You can also use a high bay spacing calculator online to speed up the process, but knowing the manual method helps you verify the results and understand the underlying physics.
Step One: Determine Exact Mounting Height Measure the distance from the floor to the bottom of the light fixture. If you are calculating for a specific task area, subtract the height of that task area from the total mounting height to get your effective mounting height.
Step Two: Choose Your Beam Angle and Multiplier Look at the specification sheet for your chosen light fixture. Find the beam angle. Lighting designers use a spacing criterion multiplier based on this angle. For a standard one hundred and twenty degree beam, the multiplier is usually around one point five. For a narrower sixty degree beam, the multiplier might be around one point zero.
Step Three: Calculate the Distance Between Fixtures Multiply your effective mounting height by the spacing criterion multiplier. If your mounting height is twenty feet and your multiplier is one point five, the distance between your lights should be thirty feet.
Fourth Step: Counting the Number of Rows and Columns The length of your room must now be divided by the spacing you just determined. You need to do the same thing for the width. This way, you will be able to know how many rows and columns of lights you will require. When counting, always round up to be sure of having enough lights to fill the room. In case of complicated facilities with unique angles and mezzanines, it is recommended that you use lighting design software.

Common High Bay Layout Mistakes to Avoid
Nevertheless, despite using an effective guide, mistakes may occur in the planning phase. By avoiding these common mistakes, your project will be a great success. Spacing Lights Too Far Apart This is the most common mistake. People try to save money by buying fewer fixtures and spacing them out too far. This results in dark aisles, poor visibility, and a facility that fails to meet safety standards. Always prioritize adequate coverage over buying the minimum number of fixtures. The cost of adding a few more lights during the initial install is much lower than retrofitting the space later.
Ignoring the Working Plane Height Calculating your layout from the absolute floor level is fine for a bare warehouse. But if you have workbenches, assembly tables, or racking systems, the working plane is higher. If you ignore this, your lights will be aimed too high, and the actual work surfaces will be under lit. Always factor in the height of the tasks being performed.
Using the Wrong Beam Angle for the Ceiling Height Putting a wide beam angle fixture on a thirty foot ceiling is a recipe for disaster. The light will spread out too much and lose all its intensity before it reaches the floor. Conversely, using a narrow beam angle on a fifteen foot ceiling will create intense, blinding hot spots directly under the lights with dark areas everywhere else. Match the beam angle strictly to the ceiling height.

Conclusion and Next Steps
It's a complex process to design the optimal lighting in a large facility, and one that involves an understanding of light physics. As you know in this High Bay Light spacing guide, the ceiling height is the most important element to consider and determine what kind of fixture you want, what the beam angle needs to be, and how far apart each light will run. If you can't remember this spacing to mounting height ratio, keep in mind your particular environmental factors and don't fall for some common mounting layout traps, you can have a space that is perfectly illuminated. Good warehouse light spacing will improve safety, productivity and greatly cut down on your long-term lighting costs. So if you're ready to upgrade your facility, never leave your lighting layout to chance! Since there are at least three different types of spacing calculators for use in professional applications, be sure to use a high bay spacing calculator or work with a lighting designer, or avail yourself of a professional lighting lay out service offered free by lighting manufacturers. Shop our vast inventory of top-of-the-line LED high bays today and make the first step towards a brighter and more efficient work space.